Key takeaways
- Rest your foot lightly on the brake pedal exactly as you would when idling on a straightaway. Do not actively press it down.
- Note the raw value. Because load cells are incredibly sensitive, even the weight of your foot or a slight physical sag in the pedal assembly can register as 1% to 3% brake application.
- Set your Minimum Deadzone (or “min value”) slightly above this resting point. This ensures that the simulator registers absolute zero braking force when you are not actively trying to slow the car down.
What's inside
Transitioning from standard potentiometer-based pedals to a load cell brake system is one of the most significant upgrades you can make to your home simulator setup. While standard pedals measure how far you push the pedal arm (distance), load cell pedals measure how hard you press the pedal face (force). This mimics the hydraulic pressure of a real race car, allowing your brain to rely on muscle memory rather than visual cues to hit your braking zones consistently.
However, simply bolting these high-performance units to your rig is only half the battle. If you do not learn how to calibrate load cell pedals sim racing systems correctly, you will run into frustrating performance bottlenecks. Poor calibration can lead to “ghost braking” (where the brakes drag even when your foot is off the pedal), premature lock-ups, or an inability to reach 100% braking force without straining your leg muscles. Proper calibration ensures that your physical inputs translate perfectly to the virtual track, safeguarding your lap times and protecting your hardware from unnecessary wear.
As an Amazon Associate we earn from qualifying purchases at no extra cost to you. Product prices and availability are accurate as of the date shown and are subject to change.

What You Need
Before diving into the calibration software, gather the necessary tools and hardware. Because load cell brakes require significant physical pressure—often ranging from 50 kg to over 100 kg of force—proper installation and the right software utilities are essential for a successful setup.
| Item / Tool | Why You Need It | Optional? |
|---|---|---|
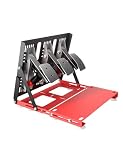
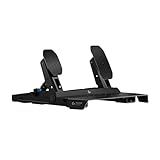
| Load Cell Pedal Set | The core hardware. Examples include the entry-level Logitech G RS Sim Racing Pedals (featuring a 75 kg load cell brake, priced around $149.99) or the premium, adjustable SIMSONN Plus X Racing Simulator Hydraulic Pedals (priced around $223). | No |
| Calibration Software | Proprietary manufacturer software (such as Logitech G HUB or SIMSONN’s dedicated utility) or universal tools like DIView. | No |
| Rigid Mounting Deck | A sturdy metal pedal plate or sim cockpit. Desk chairs and loose pedal bases will slide or flex under load cell forces. | No (Highly Recommended) |
| Hex Keys / Allen Wrenches | To swap out polyurethane elastomers, adjust pedal face angles, or change spring pre-tension. | Yes (Depending on physical adjustments) |
| Racing Shoes or Grip Socks | Protects your feet and provides consistent grip when applying high pressure to the brake pedal. | Yes |
Step-by-Step Calibration Guide
Calibrating your pedals requires a mix of physical tuning and software adjustment. Follow these steps to ensure your load cell system is perfectly tailored to your physical capabilities and driving style.
Step 1: Physical Elastomer and Spring Adjustment (Time: 10–15 Minutes)
Before opening any software, adjust the physical feel of your pedals. Load cells use polyurethane bushings (elastomers) and springs to simulate pedal resistance. If you prefer a stiff, formula-style pedal with minimal travel, install harder elastomers. If you prefer a road-car feel with more travel, swap in softer springs or bushings.
For instance, if you are using the Logitech G RS Sim Racing Pedals, you can swap the internal springs to customize the resistance curve up to its 75 kg limit. If you are using a hydraulic-hybrid system like the SIMSONN Plus X, ensure the haptic reactors or hydraulic dampers are aligned and secured before plugging the USB controller into your PC.
Step 2: Connect the Hardware and Open Calibration Software (Time: 5 Minutes)
Connect your pedal set directly to a high-speed USB port on your PC motherboard rather than a passive USB hub to avoid signal latency. Launch your manufacturer’s configuration software. If your pedals do not come with proprietary software, download “DIView,” a trusted third-party Windows utility used by sim racers worldwide to calibrate raw analog inputs.
Step 3: Establish the Minimum Deadzone (Time: 5 Minutes)
With the calibration software open, look at the live sensor reading for your brake pedal. This is often displayed as a raw numerical value or a percentage bar.
- Rest your foot lightly on the brake pedal exactly as you would when idling on a straightaway. Do not actively press it down.
- Note the raw value. Because load cells are incredibly sensitive, even the weight of your foot or a slight physical sag in the pedal assembly can register as 1% to 3% brake application.
- Set your Minimum Deadzone (or “min value”) slightly above this resting point. This ensures that the simulator registers absolute zero braking force when you are not actively trying to slow the car down.
Step 4: Set the Maximum Braking Force (Time: 5 Minutes)
This is the most critical step of the process. You must define how much physical muscle force is required to reach 100% braking power in the virtual world.
- Sit in your normal, comfortable driving position.
- Press the brake pedal down with the maximum amount of force you can comfortably and repeatedly apply during a long racing session. Do not stomp on it with emergency force; choose a threshold you can hit consistently without hurting your back or flexing your simulator frame.
- While holding this pressure, click the “Set Max” or “Calibrate 100%” button in your software. If you are using DIView, manually enter this raw value as your maximum threshold.
- Release the pedal. The software will now map your comfortable physical maximum to 100% in-game braking.
Step 5: Adjust the Brake Force Curve (Time: 10 Minutes)
Most modern calibration suites allow you to adjust the linearity curve of the brake pedal. A perfectly linear curve (1:1) means that 50% physical pressure equals 50% in-game braking. However, because of how human muscle memory works, a non-linear curve is often preferred. By setting an exponential curve, the first 50% of your pedal travel is highly precise (ideal for subtle trail braking into corners), while the final 50% of virtual braking requires a much stiffer, heavier push.
Step 6: In-Game Verification and Fine-Tuning (Time: 10 Minutes)
Launch your favorite sim racing title (such as iRacing, Assetto Corsa Competizione, or rFactor 2). Navigate to the game’s internal controller settings. Ensure that the in-game pedal sliders match your desktop software calibration. Take a few practice laps on a familiar track. Keep a close eye on the game’s telemetry UI: make sure the brake bar drops completely to zero on straights and easily reaches 100% under heavy braking without causing physical strain.
Mistakes to Avoid
- Calibrating with “Cold” Elastomers: Polyurethane elastomers stiffen up in cold rooms and soften as they warm up under foot pressure. Always press the pedal firmly 10 to 15 times to warm up the rubber components before running a calibration cycle.
- Setting the Maximum Force Too High: It is easy to overestimate your strength in a brief calibration window. Setting your maximum force to an extreme level will lead to physical fatigue over a 30-minute race, resulting under-braking and missed apexes.
- Ignoring Rig Flex: If your pedal deck or seat mounts flex when you press the brake, the load cell will register inconsistent readings. Always brace your simulator frame before trying to calibrate higher force profiles.
- Forgetting to Disable In-Game Deadzones: If you have already set deadzones in your pedal’s native software, make sure to set the in-game deadzones to 0% to avoid “double-deadzoning,” which ruins pedal sensitivity.
How Often Should You Calibrate?
As we look at the sim racing landscape in 2026, high-resolution load cells have become incredibly stable, meaning you do not need to calibrate your pedals before every single race. However, you should run through a quick calibration check in these scenarios:
- Season Changes: If your simulator is in a garage, basement, or attic, changes in ambient temperature and humidity will alter the physical density of polyurethane elastomers. Recalibrate at the start of summer and winter.
- Hardware Swaps: Any time you change your racing shoes, adjust the pedal face angles, or alter the physical elastomer stack, a complete software recalibration is required.
- Routine Maintenance: Perform a routine calibration check every 3 to 4 months to account for natural spring wear and elastomer settling.
When to Call a Pro or Replace
While load cells are highly durable, they are wear-and-tear items subject to massive mechanical stress. If you notice erratic input spikes on your telemetry, “flickering” signals at rest that cannot be solved with a deadzone, or a complete loss of signal, your load cell sensor may be failing.
Most mid-range to high-end pedals allow you to purchase and replace the load cell sensor cartridge individually for $20 to $40. However, if the metal frame of your pedal assembly begins to bend, or if you want to move from a basic 75 kg system to a more advanced hydraulic and haptic setup, it may be time to upgrade. Replacing older assemblies with highly adjustable options like the SIMSONN Plus X ($223) or the robust Logitech G RS ($149.99) can instantly restore precision and longevity to your sim rig.
Frequently Asked Questions
What is the difference between a load cell and a standard pedal?
Standard pedals use potentiometers or Hall effect sensors to measure physical distance (how far the pedal moves). A load cell measures physical force (how hard you press). This simulates the pressure-based mechanics of a real car’s hydraulic brake system, allowing for much better muscle memory and consistency.
Why is my brake pedal registering 1% or 2% input when I am not touching it?
This is common and is usually caused by the physical weight of the pedal arm resting against the sensor, temperature expansion, or minor electrical noise. You can easily fix this by setting a small minimum deadzone (around 2% to 5%) in your calibration software.
How much force (in kg) should I set my load cell to?
For most sim racers using a sturdy aluminum profile rig, a maximum force setting between 50 kg and 80 kg is the sweet spot. If you are racing on a wheel stand or a flexible office chair setup, you should lower this limit to 30 kg to 40 kg to prevent your equipment from moving or flexing.
Do I need to calibrate my clutch and throttle pedals the same way?
No. Throttle and clutch pedals typically use Hall effect sensors or potentiometers because precision in those inputs is based on travel distance rather than pressure. You only need to set the minimum and maximum travel limits for those pedals to ensure they reach 0% and 100% cleanly.