Key takeaways
- Right Stick (Attitude Control): Map the Y-axis to Pitch (nose up/down), the X-axis to Roll (banking left/right), and the Z-axis (twist) to Yaw (nose left/right). This mimics traditional atmospheric flight controls.
- Left Stick (Translational Strafe): Map the Y-axis to Forward/Backward strafe (throttle control), the X-axis to Lateral Strafe (sideways sliding), and the Z-axis (twist) to Vertical Strafe (up/down thrust).
Setting up a high-performance space flight simulator is the ultimate dream for sci-fi enthusiasts, but translating that dream into a physical room layout can quickly turn into a nightmare. If you simply plop two hefty joysticks onto a standard 30-inch-high writing desk, you will likely face immediate issues: your wrists will ache within thirty minutes, your sticks will slide across the desktop during intense dogfights, and your workspace will be swallowed by a chaotic tangle of USB cables.
A poorly planned Hands-On Stick-And-Stick (HOSAS) configuration doesn’t just ruin your immersion—it can physically damage your furniture and cause repetitive strain injuries. If you want to learn how to set up dual flight sticks space sim systems properly, you need to balance ergonomic spatial planning with precise software configuration. As we look at the best desktop gaming layouts of 2026, the trend is moving away from bulky, permanent cockpit rigs toward modular, ergonomic home-office integrations that can be assembled or tucked away in minutes.
As an Amazon Associate we earn from qualifying purchases at no extra cost to you. Product prices and availability are accurate as of the date shown and are subject to change.


What You Need
Before clearing off your desktop, you need to gather the right gear. A successful dual-stick layout requires a mix of primary controllers, mounting hardware, and cable-management tools to keep your home office looking clean and functional.
| Item | Why You Need It | Optional? |
|---|---|---|
| Dual Flight Sticks (HOSAS) | Provides 6 Degrees of Freedom (6 DoF) required for space physics. The Thrustmaster T16000M FCS Space Sim Duo Combat Flight Sim Joystick – PC ($149.99) is an industry-standard dual-stick kit out of the box. | No |
| Desk Clamps or Mounts | Lowers the joysticks to elbow height (dropping them 4 to 8 inches below the desk surface) to prevent shoulder fatigue. Typically made of heavy-duty aluminum weighing 4 to 6 pounds per mount. | Highly Recommended |
| Powered USB 3.0 Hub | Ensures both controllers receive consistent 5V/500mA power without draining your PC motherboard or causing connection dropouts. | Yes (but recommended) |
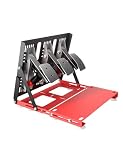
| Rudder Pedals | Adds precise foot-pedal control for yaw or roll. The Thrustmaster T-Flight Full Kit HOTAS with Rudder Pedals – XBOX & PC ($229.99) provides an excellent entry point if you want to combine pedals with a stick-and-throttle layout. | Yes |
| Neoprene Desk Pads / Pads | Protects delicate wood or glass desk edges from the high clamping pressure (up to 50 lbs of force) of metal mounts. | Yes |
Step-by-Step
Setting up your dual flight sticks requires a methodical approach that prioritizes physical comfort before diving into software calibration. Follow these five steps to get your simulator up and running.
Step 1: Position and Mount the Hardware (Time: 25 Minutes)
Do not place your joysticks directly on top of your desk. A standard desk sits 28 to 30 inches high, which forces your shoulders to shrug and your wrists to bend upward—a fast track to carpal tunnel syndrome. Instead, use adjustable metal desk mounts. Clamp the mounts to your desk, spacing them roughly shoulder-width apart (usually 20 to 24 inches from center to center). Lower the mounting plates so that when you sit comfortably in your office chair, your elbows rest at a relaxed 90-degree to 100-degree angle. Securely bolt your dual sticks, such as the Thrustmaster T16000M Space Sim Duo, to the plates. If you are using rudder pedals, place them on a non-slip floor mat directly beneath your desk where your feet naturally rest.
Step 2: Route and Power Your Cables (Time: 15 Minutes)
Dual flight sticks draw a continuous stream of data and power. Connect both joysticks to a powered USB 3.0 hub rather than plugging them directly into adjacent motherboard ports, which can sometimes share bandwidth and cause input latency. Secure the USB hub underneath your desk using adhesive hook-and-loop tape. Route the cables from each joystick mount along the undersides of the mounting brackets, securing them with reusable hook-and-loop cable ties. Make sure to leave about 3 to 4 inches of slack near the base of each stick so the mounts can be swiveled or removed without pulling on the USB ports.
Step 3: Install Drivers and Calibrate in Windows (Time: 15 Minutes)
Before launching your space simulator, your operating system must recognize the dual sticks as separate, independent controllers. Plug in your USB hub and download the latest proprietary drivers from the manufacturer’s website. Once installed, search for “Set up USB game controllers” in your Windows search bar (or type joy.cpl in the Run dialog). Select your first stick, click “Properties,” and move the stick through its full range of motion to ensure the crosshairs hit all four corners smoothly. Repeat this process for the second stick. If you are using a dual-stick setup of the same brand, Windows may label them identically; take note of which stick is designated as “Controller 1” and “Controller 2” by watching which properties window reacts when you move the left or right stick.
Step 4: Map the Six Degrees of Freedom (Time: 35 Minutes)
Launch your space simulator (such as Star Citizen or Elite Dangerous) and head straight to the control binding menu. Space flight requires managing six axes of movement, which is why dual sticks are superior to a traditional single-stick-and-throttle setup. Use this standard HOSAS layout for the most intuitive flight feel:
- Right Stick (Attitude Control): Map the Y-axis to Pitch (nose up/down), the X-axis to Roll (banking left/right), and the Z-axis (twist) to Yaw (nose left/right). This mimics traditional atmospheric flight controls.
- Left Stick (Translational Strafe): Map the Y-axis to Forward/Backward strafe (throttle control), the X-axis to Lateral Strafe (sideways sliding), and the Z-axis (twist) to Vertical Strafe (up/down thrust).
Spend time mapping your primary weapons, shields, and targeting functions to the hat switches and buttons on your right stick, while reserving utility controls like landing gear, quantum drive, and space brakes for your left stick.
Step 5: Configure Deadzones and Sensitivity Curves (Time: 15 Minutes)
Because mechanical joysticks have slight physical tolerances, they rarely return to a perfect mathematical zero when you let go. In your game’s control settings, add a small “deadzone” (typically between 2% and 5%) to all analog axes. This prevents your ship from slowly drifting or rotating when your hands are off the sticks. Finally, adjust your sensitivity curves. A slightly curved, exponential sensitivity profile ensures that small, gentle hand movements near the center of the stick result in precise micro-adjustments for landing or aiming, while pushing the stick to its outer limits still delivers maximum thruster output.
Mistakes to Avoid
- Clamping Mounts to Hollow-Core Desks: Many modern budget desks are constructed with paper-honeycomb interiors wrapped in thin fiberboard. Clamping heavy metal flight mounts with high torque will crush these desks. Only mount your gear to solid wood, plywood, or steel-reinforced desks.
- Skipping the Powered USB Hub: Standard motherboard USB ports can struggle to supply steady power to multiple high-draw peripherals simultaneously. This often results in your sticks randomly disconnecting or failing to register button presses during intense gameplay.
- Using Too Wide of a Stance: Mounting your flight sticks too far apart forces your arms to flare outward, putting immense pressure on your rotator cuffs. Keep the sticks aligned with your natural shoulder width.
- Forgetting to Secure the Rudder Pedals: If you use pedals, placing them on a slick hardwood or laminate floor will cause them to slide away from you when you stomp on the brakes. Use a high-traction rubber mat or physical stoppers to lock them in place.
How Often
To keep your dual-stick cockpit in peak condition, perform routine maintenance. Every three months, check the tension bolts on your metal desk clamps; regular vibrations from gameplay can slowly loosen the clamps, which can lead to a mount slipping mid-flight. Every six months, use a can of compressed air to blow out any dust or pet hair that has accumulated around the gimbals and sensors of your joysticks, as dust buildup can cause sensor jitter. Finally, recalibrate your sticks in Windows once a year, or whenever you notice your ship drifting despite having deadzones configured.
When to Call a Pro or Replace
While there are no professional home installation services specifically for flight simulators, you can easily diagnose when your hardware is reaching the end of its lifespan. If you experience severe “axis drift”—where your ship constantly rolls or yaws and adjusting the deadzone up to 15% does not fix it—the internal potentiometers are likely worn out. At this point, it is time to replace your controllers. If you find yourself constantly adjusting slipping mounts or if you notice cracks forming in your desk surface, you should upgrade your mounting hardware or invest in a thicker, solid-wood desktop to support the mechanical stress of your simulator setup.
FAQ
Can I use two different brands of joysticks for a HOSAS setup?
Yes. Windows and modern space simulators can read inputs from different USB game controllers simultaneously. You can easily pair a premium joystick on your right hand with a budget-friendly option on your left hand, though using a matched pair like the Thrustmaster T16000M Space Sim Duo simplifies driver management and button-mapping muscle memory.
How do I protect my wooden desk from heavy metal clamp mounts?
To prevent metal clamps from denting or scratching your furniture, place a thin piece of high-density rubber, a neoprene coaster, or a scrap piece of hardwood between the clamp pads and the desk surface. This distributes the pressure evenly and prevents the metal from biting into the wood finish.
Do I need rudder pedals if I have dual flight sticks?
No, rudder pedals are not strictly necessary for HOSAS. Most dual-stick setups feature “twist” (Z-axis) functionality on both sticks, giving you enough analog inputs to cover all six degrees of freedom. However, adding dedicated pedals offloads yaw or vertical thrust to your feet, which can free up your hands for more precise aiming.
Why does my space sim game register both of my joysticks as the same controller?
This is a common issue when using identical joysticks. It occurs because the game engine confuses the unique USB hardware IDs. You can resolve this by plugging the sticks into different USB controller clusters on your PC (e.g., one in the front panel and one in the rear), or by using third-party mapping software like JoyToKey or vJoy to assign unique virtual device profiles to each physical stick.