Key takeaways
- 60 FPS equals about 16.7 ms per frame.
- 90 FPS equals about 11.1 ms per frame.
- 120 FPS equals about 8.3 ms per frame.
To fix FPS drops in Escape from Tarkov, first identify whether the problem is a CPU limit, GPU limit, memory pressure, shader stutter, thermal throttling, or an unstable driver, then change one variable at a time and verify the result with FPS and frametime data.
1. Measure the problem before changing settings
Use an overlay or monitoring tool that can display FPS, 1% lows, frametime, GPU utilization, CPU utilization, temperatures, clock speeds, VRAM usage, and system memory usage. Record the same location, map, and activity for each test because Tarkov performance varies heavily by map, player count, weather, AI activity, and patch.

Surrta Escape from Tarkov Red Key Card Black KeyCard Collection Model NFsee Tag Card Full Set Large Secure Container2
Included for 'How to Fix FPS Drops in Escape from Tarkov' as a relevant option in this category; details come from the product listing.
View on Amazon
7-Piece Escape from Tarkov Labs Keycard Set – Red, Blue, Yellow, Violet, Access, Black, and Green – High-Detail PVC Collection
Included for 'How to Fix FPS Drops in Escape from Tarkov' because the listing specifies Red and Blue, details this guide uses to compare options.
View on Amazon
2PCS Escape from Tarkov Bear and USEC Embroidery Patch Military Applique Hook and Loop Armband Patches (color1)
Included for 'How to Fix FPS Drops in Escape from Tarkov' as a relevant option in this category; details come from the product listing.
View on Amazon
TOP CUSTOMS Escape from Tarkov Beanie - Scav Beanie, Ponpon hat Replica
Included for 'How to Fix FPS Drops in Escape from Tarkov' because the listing specifies Scav Beanie and Ponpon hat Replica, details this guide uses to compare options.
View on AmazonFrametime is often more useful than average FPS. It shows how long each frame takes to render:
- 60 FPS equals about 16.7 ms per frame.
- 90 FPS equals about 11.1 ms per frame.
- 120 FPS equals about 8.3 ms per frame.
A brief 100 FPS reading does not mean the game feels smooth if frametime repeatedly spikes to 40–80 ms. Compare average FPS with 1% lows and look for spikes while loading into a raid, turning quickly, entering a dense area, or encountering AI.
| Observed symptom | Likely limit | First check | Useful first fix |
|---|---|---|---|
| GPU usage stays below 85%, one or two CPU threads are busy | CPU or game-thread limit | Per-thread CPU usage and clocks | Reduce CPU-heavy visibility settings; close background tasks |
| GPU usage is 95–99%, VRAM is nearly full | GPU or VRAM limit | GPU temperature, power, VRAM, resolution | Lower resolution or texture quality; check cooling |
| RAM reaches 90–100%, disk activity rises during stutters | Memory pressure or paging | Committed memory and pagefile activity | Close applications; use a system-managed pagefile; consider 32 GB RAM |
| FPS is acceptable but frametime spikes after driver or game updates | Shader cache or driver issue | Recent update history and shader-cache behavior | Clean-install the driver and allow shader compilation to finish |
2. Apply a stable Tarkov graphics baseline
Start with a reproducible baseline rather than copying an internet preset. Use your monitor’s native resolution, exclusive fullscreen if it behaves better on your system, and a sensible frame-rate cap. A cap slightly below the refresh rate can reduce queueing and frametime variation; for a 144 Hz display, test 138–141 FPS if your hardware can maintain it.
Recommended starting values
- Texture quality: High with 8 GB or more of VRAM; Medium if VRAM is filling or stutters occur when turning.
- Shadows: Low or Medium. Higher values can increase GPU work without solving CPU-side drops.
- Object LOD quality: Start at 2.0. Test 2.5 only if distant geometry matters and CPU performance remains available.
- Overall visibility: Start around 1,500–2,000 m. Higher values can increase CPU and GPU workload substantially.
- HBAO and SSR: Off or Low while diagnosing. Re-enable them one at a time if image quality matters more than performance.
- Anti-aliasing: TAA High is a reasonable baseline. Compare it with TAA Low and any available upscaling option at your resolution.
- Resampling: Keep at 1x initially. Lower values can improve GPU-limited performance but make distant targets less clear.
- Post-processing: Disable motion blur, chromatic aberration, noise, and film grain while troubleshooting.
- Automatic RAM cleaner: Test it rather than assuming it helps. It may reduce memory pressure on systems with limited RAM, but can also trigger extra cleanup behavior during play.
For a GPU-limited system, reduce resolution, resampling, anti-aliasing, HBAO, and SSR in that order. For a CPU-limited system, reduce visibility and object-detail settings first. Lowering every option will not fix a game-thread bottleneck and may only make the image worse.
3. Choose settings according to your bottleneck
| System situation | Prioritize | Avoid first | Reason |
|---|---|---|---|
| Modern 6–8-core CPU, midrange GPU, 8 GB VRAM | Medium textures, lower shadows, moderate resolution | High textures at 1440p if VRAM is near full | VRAM overflow can cause asset-streaming stutter |
| Fast GPU, older or low-clocked CPU | Visibility 1,500–2,000 m, moderate object LOD | Very high visibility and LOD | These settings can increase CPU and draw-call pressure |
| 16 GB system RAM | Closed background applications and a system-managed pagefile | Browsers, launchers, recording tools left open | Tarkov and Windows can approach the available memory ceiling |
| 1440p or ultrawide display with a GPU below 12 GB VRAM | Texture Medium/High according to measured VRAM usage | Maximum textures plus high-resolution supersampling | Resolution increases framebuffer and asset pressure |
4. Fix Windows settings that commonly cause stutter
- Use a reliable power mode. In Windows power settings, select Balanced or Best performance. Balanced is usually preferable for temperatures and noise; Best performance can help a laptop or desktop that is downclocking too aggressively.
- Close overlays and capture tools. Temporarily disable Xbox Game Bar recording, Discord overlay, browser hardware acceleration, RGB utilities, motherboard monitoring suites, and third-party recording software. Re-enable them individually after testing.
- Check background CPU activity. Pause cloud synchronization, game updates, antivirus scans, and browser tabs that use video or scripts. A background process consuming one busy CPU core can produce visible spikes in a CPU-limited game.
- Keep the pagefile enabled. A system-managed pagefile on an SSD is safer than disabling virtual memory. If committed memory approaches the physical RAM limit, Windows can otherwise become unstable or force applications to close.
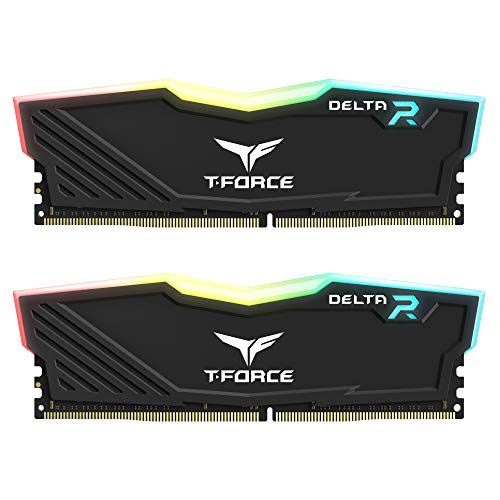
- Enable the correct memory profile. In the motherboard firmware, verify that XMP or EXPO is enabled if your memory kit and platform support it. Confirm stability afterward; unstable memory can look like random game stutter or crashes.
- Test hardware-accelerated GPU scheduling. HAGS can improve or worsen frametime consistency depending on the driver and system. Record one test with it enabled and one disabled, then keep the smoother result.
Do not use registry “FPS boost” packs, timer-resolution scripts, or random process-priority tools as a first resort. They rarely address the actual bottleneck and can make troubleshooting harder.
5. Check graphics drivers and game files
If drops began immediately after a driver update, compare the current driver with the previous stable version for your GPU. Use the graphics driver’s clean-install option, or remove the existing driver with a reputable display-driver cleanup utility in Windows Safe Mode when a normal reinstall does not help.
- Install the current Game Ready or equivalent gaming driver for your GPU.
- Reset custom GPU control-panel profiles for Tarkov before testing.
- Use the default shader-cache setting unless you have a specific reason to change it.
- Verify the game files through the launcher after crashes, interrupted updates, or missing textures.
- Allow the game to rebuild shaders after a driver or major game update; the first raid may not represent normal performance.
For NVIDIA GPUs, test Reflex if the game exposes it, especially when latency is more important than maximum FPS. For AMD GPUs, test Radeon Anti-Lag and driver-level features individually. Avoid stacking multiple frame-generation, sharpening, overlay, and latency features while diagnosing a native rendering problem.
6. Monitor temperature, clocks, and power
Use a monitoring overlay or logging utility during a raid. A GPU that reaches its thermal limit may reduce clock speed, while a CPU can lower frequency because of temperature, motherboard power limits, or laptop power sharing. Compare clock speeds during a smooth section with those during a drop.
- GPU usage near 99% with stable clocks indicates a normal GPU bottleneck, not necessarily a fault.
- GPU usage suddenly falls while CPU usage, temperature, or disk activity rises suggests a non-GPU bottleneck.
- Clock speed falling at the same time as a temperature spike suggests cooling or airflow trouble.
- VRAM consistently within a few hundred megabytes of capacity supports lowering textures or resolution.
- System RAM above roughly 90% during a stutter supports closing applications, restarting the game between long sessions, or upgrading memory.
Clean dust filters, confirm that case fans are oriented correctly, and check that the GPU power connectors are fully seated. Do not apply an aggressive overclock until the system is stable at stock settings. A modest, stable undervolt can sometimes reduce thermal throttling, but it should be tested with a repeatable workload rather than assumed to improve performance.
7. Verify the improvement with a repeatable test
After each change, restart the game if it affects shaders or memory, then repeat the same route or offline test. Record average FPS, 1% low FPS, and the largest frametime spikes. A useful improvement is not just a higher average; it is fewer long spikes and a higher 1% low.
For example, if a baseline is 78 FPS average with a 1% low of 38 FPS, reducing visibility and disabling overlays may produce 80 FPS average with a 1% low of 52 FPS. That is a worthwhile result even though the average rose only slightly, because the worst moments are less disruptive. Exact gains vary by map, patch, CPU, GPU, resolution, and background load.
When an upgrade is the practical fix
If the game remains CPU-limited with low GPU utilization after background tasks, temperatures, memory profiles, and settings are checked, a faster gaming CPU is more relevant than a stronger graphics card. If GPU utilization remains near maximum and VRAM is full, a higher-performance GPU with more VRAM or a lower resolution is the appropriate direction.
As a practical minimum for a smoother modern Tarkov setup, 32 GB of system RAM is preferable to 16 GB, an SSD is strongly recommended, and a processor with strong single-thread performance is valuable. Upgrade only after monitoring identifies the limiting component; otherwise it is easy to spend money on hardware that does not change the drops.