Key takeaways
- Download your chosen distro’s ISO file from its official website.
- Use a tool such as Balena Etcher or Ventoy to write the ISO to an 8GB or larger USB stick.
- Verify the download checksum to make sure the image is not corrupted.
- Keep the drive handy, as you can also use it as a live environment to test hardware first.
What's inside
- Watch: How To Install Linux For Gaming — Video Review
- Step 1: Back Up and Choose Your Distro
- Step 2: Create a Bootable USB Drive
- Step 3: Boot and Run the Installer
- Step 4: Install Drivers and Gaming Tools
- Step 5: Optimize and Start Playing
- Related Guides
- Frequently Asked Questions
- Conclusion
- Related Articles
- Related Guides
Installing Linux for gaming sounds intimidating, but in 2026 the process is closer to setting up a console than wrestling with cryptic commands. With Proton handling most Windows games and distros shipping gaming drivers by default, the hardest part is often simply deciding which distribution to install first. This guide walks you through the entire journey, from backing up your data to launching your first game.
- Watch: How To Install Linux For Gaming — Video Review
- Step 1: Back Up and Choose Your Distro
- Step 2: Create a Bootable USB Drive
- Step 3: Boot and Run the Installer
- Step 4: Install Drivers and Gaming Tools
- Step 5: Optimize and Start Playing
- Related Guides
- Frequently Asked Questions
- Conclusion
- Related Articles
- Related Guides
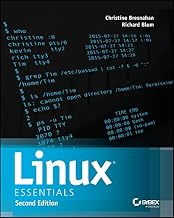
We will keep things practical and beginner-friendly, pointing to clear step-by-step handbooks such as the Bazzite Linux Guide and Linux Mint Made Simple for Beginners whenever you want a deeper reference. These are the companion resources we recommend keeping open beside you.
As an Amazon Associate we earn from qualifying purchases at no extra cost to you. Product prices and availability are accurate as of the date shown and are subject to change.


⚡ Save on Your Next PC — Amazon Prime
Prime members get fast free shipping on the systems above, plus early access to Prime Day & Black Friday PC deals. New members get a 30-day free trial.
Watch: How To Install Linux For Gaming — Video Review
Step 1: Back Up and Choose Your Distro
Before anything else, copy your important files to an external drive or cloud storage, because installing an operating system can wipe a partition. Then pick a gaming-friendly distribution. Windows switchers usually land on Mint or Bazzite, and a guide like Linux Mint Cinnamon for Windows Users explains the differences in plain language so you choose confidently rather than guessing.
Step 2: Create a Bootable USB Drive
- Download your chosen distro’s ISO file from its official website.
- Use a tool such as Balena Etcher or Ventoy to write the ISO to an 8GB or larger USB stick.
- Verify the download checksum to make sure the image is not corrupted.
- Keep the drive handy, as you can also use it as a live environment to test hardware first.
Step 3: Boot and Run the Installer
Restart your PC and press the boot-menu key, usually F12, F2, or Delete, to select the USB drive. Most gamers should try the live session first to confirm Wi-Fi, audio, and graphics work. When you are satisfied, launch the installer, choose your language and timezone, and let it partition the disk. A reference such as Linux Mint 22.3 Zena: A Calm Beginner’s Guide to Switching from Windows mirrors these screens closely if you want reassurance at each prompt.
Step 4: Install Drivers and Gaming Tools
Once you reach the desktop, update the system and install GPU drivers if your distro did not include them. Then add Steam, enable Proton in the settings, and install Lutris or Heroic for non-Steam titles. For anyone who wants to understand what these tools do underneath, How Linux Works, 3rd Edition is an excellent superuser primer, while Linux for Beginners: The Complete Survival Guide to Commands, Terminal, and System Administration demystifies the occasional terminal command.
Step 5: Optimize and Start Playing
Enable Steam Play for all titles, check ProtonDB for game-specific tweaks, and consider a gaming-tuned kernel if your distro offers one. Add MangoHud to monitor frame rates and GameMode to squeeze out extra performance. From here, your library should launch much as it did on Windows, and the comprehensive Linux: The Comprehensive Guide to Mastering Linux is worth bookmarking for when you outgrow the basics.
Frequently Asked Questions
Is installing Linux for gaming hard for beginners?
Not anymore. Modern installers are graphical and guided, and gaming distros preload most drivers. Following a step-by-step handbook alongside the installer removes nearly all the guesswork.
Will I lose my games when I switch to Linux?
Your Steam library re-downloads on any system, so your purchases are safe. Most titles run through Proton, though you should check ProtonDB for any that need extra configuration.
Can I dual-boot Linux and Windows?
Yes. During installation you can shrink your Windows partition and install Linux alongside it, letting you choose an operating system at every startup.
Do I need to use the terminal to game on Linux?
Rarely. Steam, Lutris, and system updaters are all graphical. A beginner command guide is useful for occasional troubleshooting but is not required for daily play.
Conclusion
Installing Linux for gaming is a straightforward afternoon project once you break it into steps: back up, create a USB, install, add drivers, and optimize. Keep a beginner-focused handbook nearby for confidence, lean on Proton for compatibility, and you will have a fast, free gaming platform that keeps improving with every release throughout 2026.