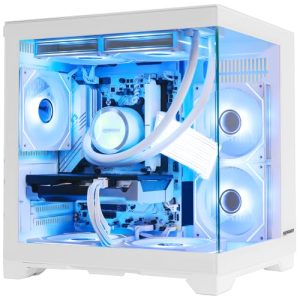
Our Top Picks
The BIOS settings that matter most for gaming are three: turn on the memory profile (XMP on Intel, EXPO on AMD), enable Above 4G Decoding together with Resizable BAR, and update the BIOS first so those options behave. Everything else, from fan curves to boost limits, is optional polish, and most of it carries more risk than reward.
Quick Answer: The Short List
Before opening the menus, update the motherboard firmware from the board maker’s support page and read the manual section on how to enter setup, usually by tapping Delete or F2 at power-on. Then work through the settings below in order. Menu names differ between ASUS, MSI, Gigabyte and ASRock, and between older and newer firmware, so treat the paths here as typical and rely on the board manual for exact wording.

The Top Free Tools to Optimize Your Gaming Computer
Picked as a relevant option in this category.
View on Amazon
Luqeeg DDR4 RAM 3600MHz for PC Gaming, XMP2.0 (16GB(2x8GB)) | Effective heat management design, superior stability performance, CL16 ultra-low sync
Chosen because it specifies XMP2.0 (16GB(2x8GB)) and Effective heat management design.
View on Amazon
Aumotop PCIE 5.0 X16 Riser Cable 20cm, 128Gbps High Speed | Flexible design, perfect for gaming, durable ABS build, optimizes airflow
Chosen because it specifies 128Gbps High Speed and Flexible design.
View on Amazon| Setting | Typical value for gaming | What it does | Risk level |
|---|---|---|---|
| XMP (Intel) / EXPO (AMD) / DOCP | Profile 1 or the highest profile on the kit | Runs memory at its rated speed instead of the slow default | Low to moderate; counts as an overclock |
| Above 4G Decoding | Enabled | Lets the CPU address the full graphics memory window | Low |
| Resizable BAR | Enabled (or Auto) | Gives the CPU wider access to video memory | Low; gains vary by game |
| CSM / Legacy boot | Disabled (UEFI mode) | Required for Resizable BAR on most boards | Moderate if the OS was installed in legacy mode |
| Fan curve | Maker’s balanced profile | Controls noise and temperatures | Low |
| PBO or manual CPU overclock | Leave default unless you know why | Raises boost behavior | Higher; can affect stability and warranty |
Step 1: Update the BIOS Before Changing Anything
Newer firmware often improves memory compatibility and adds support for newer processors. Download the file from the motherboard maker’s own support page for your exact board name and revision, and follow the maker’s flashing instructions. Do not interrupt the update; use a stable power source and, if you can, a desktop on a surge protector or battery backup. Many boards offer a built-in flash tool inside setup, and some support a flash button that works without a CPU installed. Check your manual to see which applies.
Updating resets some settings to defaults, so make the other changes afterward. It also helps to photograph any custom settings beforehand.
Step 2: Enable the Memory Profile (XMP or EXPO)
New memory kits usually start at a conservative baseline speed defined by the JEDEC standard, not the advertised speed on the box. A profile stored on the kit tells the BIOS the speed and timings the maker rated it for. Intel boards call this XMP, AMD AM5 boards call it EXPO, and older AMD boards use DOCP or A-XMP. Reviewers note that the option is commonly found under a tweaker or overclocking tab, and that the name of that tab changes by brand.
- Enter setup and find the memory or overclocking section.
- Select the profile option and choose Profile 1, or the profile that matches the speed printed on the kit.
- Save and reboot. If the machine fails to boot, most boards fall back to defaults automatically after a few attempts.
Because this runs memory beyond baseline, motherboard makers generally describe it as overclocking, and stability can depend on the kit, the board, and the number of modules installed. Four-module setups are typically harder to run at top speeds than two-module setups. If games crash or the system restarts, try a lower profile speed or consult the motherboard’s memory support list, which the maker publishes for each board.
Step 3: Turn On Above 4G Decoding and Resizable BAR
Resizable BAR lets the processor access the graphics card’s whole memory pool instead of small chunks. AMD markets the idea as Smart Access Memory, and NVIDIA and Intel support it on recent cards. Reviewers report that results differ by title: some games gain a few percent, some show no change, and a few lose slightly. The feature is therefore worth enabling but not worth expecting miracles from.
Requirements usually include a recent processor, a supported graphics card, up-to-date firmware and UEFI boot mode. On many boards the Resizable BAR option only appears after Above 4G Decoding is enabled. The typical menu location is under Advanced and PCI Subsystem Settings, though some boards list it under an IO or Peripheral section.
- Enable Above 4G Decoding.
- Disable CSM if your Windows install uses UEFI boot. If you are unsure, do not change this one blindly, because switching modes on a legacy-installed drive can stop Windows from starting.
- Enable Resizable BAR (sometimes labeled Re-Size BAR Support or Smart Access Memory).
- Save, boot, and confirm in the graphics card utility. GPU-Z lists the status, and the NVIDIA Control Panel system information page shows it on GeForce cards.
Step 4: Check the Boot and Storage Settings
Gaming performance does not depend much on boot settings, but a few help load times and reliability. Make sure the fastest drive is the first boot device, keep secure boot and TPM settings at what Windows 11 expects, and leave the storage controller mode at the default unless the manual says otherwise. Fast Boot can shorten start-up, but it may skip steps that help when you change hardware, so some users turn it off during upgrades.
Step 5: Leave CPU Overclocking and Voltages Alone at First
Modern processors already boost themselves close to their thermal and power limits. AMD’s Precision Boost Overdrive and Intel’s various power-limit options can raise sustained clocks, but they also raise heat, power draw and the chance of instability. The AMD X3D chips in particular have specific voltage and boost behavior, and motherboard makers have published firmware changes over the years to protect them, which is another reason to keep firmware current. Changing voltages manually can void a warranty and can damage components if set too high. If you do experiment, change one value at a time, use conservative steps, and stop if temperatures climb.
Step 6: Set Sensible Fan and Power Options
A balanced or standard fan profile is enough for most gaming desktops. Silent profiles can let temperatures rise under long sessions; full-speed profiles are noisy. If your motherboard has a temperature-based curve, connect the CPU cooler pump or fan to the correct header (labeled CPU_FAN or AIO_PUMP in the manual) so the board can read it. Also leave the C-state and power saving options at defaults unless you have a specific stutter problem, since disabling them mostly raises idle power and heat.
Which Settings Suit Which Player
| If you are… | Do this | Skip this |
|---|---|---|
| New to BIOS | Update firmware, enable memory profile, enable Resizable BAR | Manual voltages, timing tweaks |
| Playing esports titles at high frame rates | Memory profile at the highest stable speed, balanced fan curve | Aggressive overclocks that risk crashes mid-match |
| Running a 4-module memory setup | Try a profile, drop speed one step if unstable | Forcing top-rated speeds without testing stability |
| Using a small case | Fan curve that ramps earlier | Silent profile with no temperature monitoring |
Common Mistakes
- Skipping the memory profile. This is the most frequent reason a new build underperforms; memory can silently run at baseline speed.
- Flipping CSM off on a legacy-installed drive. Windows may not boot until you return the setting or convert the disk, a step covered in Microsoft’s documentation.
- Stacking several overclocks at once. When something crashes you cannot tell which change caused it.
- Using old firmware. Missing Resizable BAR options or poor memory training are often fixed in later releases.
- Forgetting to save. Most boards use F10 to save and exit, but confirm on the screen prompt.
- Ignoring temperatures. After any change, run a game for a while and watch CPU and GPU temperatures in a monitoring tool.
If the PC Will Not Boot After a Change
Do not panic. Most boards recover on their own after repeated failed starts, loading safe defaults. If not, power the machine fully off and unplug it before touching anything inside, then use the clear CMOS jumper or button described in the manual, or briefly remove the coin cell battery. This resets all settings, so you will need to redo the steps above one at a time. If the board still does not post, contact the motherboard maker or a technician.
Alternatives to Manual BIOS Tuning
- Maker auto-tuning tools. Some boards include one-click performance profiles. They apply several changes at once, so read what each profile changes first.
- Windows-side tuning. Updating graphics drivers, enabling Game Mode and checking power plan settings can help without touching firmware.
- Hardware upgrades. Faster memory kits and better cooling often give larger gains than deep BIOS adjustments.
Frequently Asked Questions
Is it safe to change BIOS settings for gaming?
Enabling the memory profile and Resizable BAR is widely considered low risk, and boards can reset to defaults if something fails. Manual voltage and overclock changes are riskier and may void a warranty. Make one change at a time.
Does Resizable BAR always improve FPS?
No. Reviewers report that gains range from nothing to a noticeable lift depending on the game and hardware. It is generally harmless to leave on, though a few titles have shown small losses.
Why can’t I find the XMP or EXPO option?
Look under the overclocking, tweaker or memory tab, and check that the kit actually carries a profile. Some boards hide it until advanced mode is shown. The motherboard manual lists the exact menu name for your model.
Should I disable C-states or other power saving features?
Generally not. The effect on frame rates is small for most players, while idle power and heat go up. Only change them if you are chasing a specific stutter problem.
How do I reset the BIOS if I break something?
Turn off and unplug the PC, then use the clear CMOS button or jumper from the manual, or briefly remove the coin cell battery. After that, re-enter the settings gradually.
Do I need to update the BIOS before enabling these options?
It is a good idea. Newer firmware often improves memory support and adds missing options. Use the file from the motherboard maker’s support page and follow their flashing instructions exactly.
FAQ
Is it safe to change BIOS settings for gaming?
Does Resizable BAR always improve FPS?
Why can’t I find the XMP or EXPO option?
Should I disable C-states or other power saving features?
How do I reset the BIOS if I break something?
Do I need to update the BIOS before enabling these options?
More from Amazon
Programs that pair well with the guide above. Offers and eligibility are set by Amazon and may change.
Free shipping on eligible items, Prime Video and more. Eligible new members can start with a free trial.
Start a Prime free trialAd-free music streaming. Eligible new subscribers can start with a free trial.
Try Music Unlimited freeA Prime membership for ages 18-24 with a trial period. Eligibility is set by Amazon.
See Prime for Young AdultsAudiobooks and podcasts to listen to on the go. Eligible new members can start with a free trial.
Try Audible freeAs an Amazon Associate we earn from qualifying purchases.