Our Top Picks
The best PC building tips for beginners are really a list of mistakes other first-timers have made: forgetting the CPU power cable, leaving the monitor plugged into the motherboard, using too much thermal paste, installing extra standoffs, and forcing parts that were not lined up. Each mistake has a simple prevention step. This guide lists the main ones in the order you are likely to meet them, explains why each happens, and tells you how to check your work before you press the power button.
If you only remember one thing, remember this: almost every connector in a PC is keyed to fit one way. If you have to force it, stop and look again. Careful reading of the manual beats strength every time.
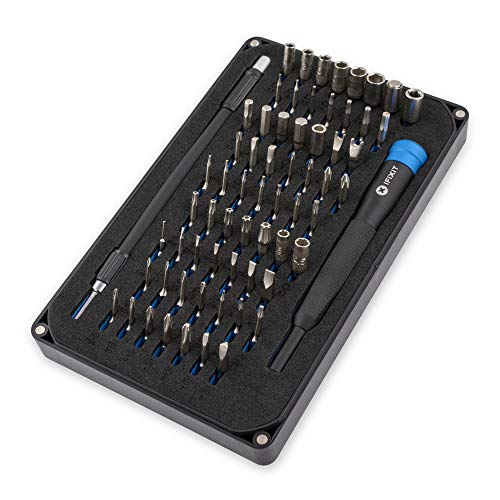
iFixit Mako Driver Kit - 64 Precision Bit Set for Electronics Repair | 64 Precision Bit Set for Electronics Repair
Chosen because it specifies 64 Precision Bit Set for Electronics Repair and 64 Precision Bit Set for Electronics Repair.
View on Amazon
iFixit Pro Tech Toolkit - Electronics, Smartphone, Computer & Tablet Repair Kit
Chosen because it specifies Electronics and Smartphone.
View on Amazon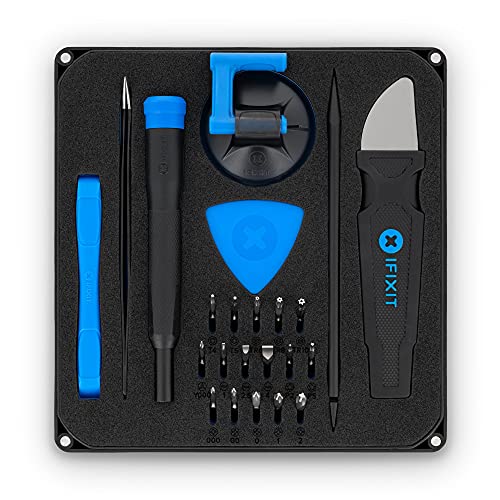
iFixit Essential Electronics Toolkit - PC, Laptop, Phone Repair Kit | Starter tool set with 16 precision bits (4 mm), magnetic screwdriver & opening tools for electronic devices
Chosen because it specifies Laptop and Phone Repair Kit.
View on AmazonQuick answer
| # | Mistake | One-line prevention |
|---|---|---|
| 1 | Parts that are not compatible | Check socket, memory type and case size before buying |
| 2 | Parts that do not physically fit | Compare graphics card length and cooler height to the case limits |
| 3 | Static and careless handling | Touch bare metal, hold by edges, build on a hard surface |
| 4 | Bent CPU socket pins | Never press the CPU, align the triangle, close the lever lightly |
| 5 | Half-seated RAM | Press both ends until the clips click |
| 6 | Too much thermal paste or leftover film | Pea-sized dot, remove plastic from the cooler base |
| 7 | Extra or missing standoffs | Match standoffs to board holes before mounting |
| 8 | Forgotten I/O shield | Check whether the board has one built in; if not, fit it first |
| 9 | Missing CPU 4+4 pin power | Connect the EPS cable at the top of the board |
| 10 | Graphics card power missing or loose | Connect every connector and seat it fully |
| 11 | Wrong front-panel wiring | Follow the pin diagram in the manual |
| 12 | Monitor on the motherboard port | Plug into the graphics card |
| 13 | Skipping the BIOS memory profile | Enable XMP or EXPO after the first boot |
| 14 | Poor airflow and cable clutter | Plan fan direction, route cables behind the tray |
Before you buy: planning tips
buying parts that do not work together
Compatibility is the biggest source of expensive errors. Start with the CPU, then pick a motherboard with the right socket, then match the memory type. AMD’s current desktop platform, AM5, uses DDR5 only. Intel’s Core Ultra 200S processors use the LGA1851 socket with DDR5. Older Intel 12th to 14th generation processors use LGA1700, and those boards come in both DDR4 and DDR5 versions. Always read the board’s product page for its supported CPU and memory list, and check whether a BIOS update is needed for newer chips.
| Check | Where to find the answer |
|---|---|
| Does the CPU fit this motherboard? | Motherboard maker’s CPU support list |
| Which memory type and speeds? | Motherboard specification page and qualified vendor list |
| Does the board fit this case? | Case specification: supported motherboard sizes |
| Does the power supply have the right connectors? | Graphics card specification and power supply cable list |
| Does the SSD match the slot? | Board manual: M.2 slot types (PCIe or SATA) and lengths |
A parts-list checker such as PCPartPicker flags many incompatibilities automatically, but it is not a substitute for reading the manufacturer’s specification, because it cannot see BIOS version requirements or every physical clearance.
ignoring clearances
A graphics card can be longer than the case allows, a tower cooler can be too tall for the side panel, and a radiator can collide with memory. Write down three limits from the case specification (graphics card length, cooler height, radiator support) and compare each with your parts. Allow a little extra, because power plugs add to a card’s length at the end.
underbuying the power supply
The graphics card manufacturer states a recommended power supply wattage. Use that, and buy from a reputable maker. A weak or poor-quality unit is the part most likely to cause random shutdowns or damage other parts. Efficiency ratings, such as 80 Plus Gold, show how much of the wall power reaches the PC, and also correlate with component quality, though they are not a guarantee on their own.
At the table: handling tips
static and rough handling
Static discharge rarely kills a part on its own, but you do not need the risk. Work on a hard, clean surface, touch the bare metal of the case before handling components, hold boards and cards by the edges, and leave parts in their anti-static bags until needed. An anti-static wrist strap is optional but inexpensive.
bending pins in the CPU socket
On AMD AM5 and Intel LGA sockets, the pins are in the socket on the motherboard. They are tiny and fragile, and a bent pin can mean a damaged board. To avoid trouble:
- Never touch the socket contacts.
- Match the small triangle on the CPU corner to the triangle on the socket.
- Lower the CPU straight down without pressing or sliding it.
- Close the retention lever with steady, moderate pressure. If it needs great force, lift it and re-check the CPU.
- Keep the socket protective cap, because some manufacturers require it for warranty returns.
half-seating the memory
RAM that is not fully seated causes no picture or a memory error. Use the slot positions the manual lists for two modules, align the notch, and press firmly at both ends until the clips click. Do it with the board flat on a table, not while it is hanging in the case.
thermal paste problems
| Situation | Right approach |
|---|---|
| Cooler has paste pre-applied | Remove the protective film, do not add more |
| You apply your own | A pea-sized dot in the centre of the CPU lid |
| Too much paste squeezed out | Wipe off with a lint-free cloth and isopropyl alcohol, re-apply a small amount |
| Cooler removed after use | Clean both surfaces and use fresh paste |
Too much paste can ooze onto the socket area and clutter the contact, while too little causes hot spots. A pea-sized dot is the amount most manufacturers and reviewers recommend. Also remove the clear plastic film on the base of the cooler; leaving it on is a classic first-time error that causes rapid overheating.
mounting the cooler unevenly
Tighten the mounting screws in a diagonal order, a little at a time, so pressure spreads evenly. Stop when each screw is snug. Check that the fan cable reaches the CPU fan header and does not touch the blades.
Inside the case: mounting tips
extra or missing standoffs
Standoffs are brass posts that lift the motherboard off the case tray. There should be one under every screw hole on your board and none where there is no hole. An extra standoff touching the back of the board can short it. Before mounting, hold the board above the tray and compare holes with posts. Move the posts as needed for micro-ATX or Mini-ITX layouts.
forgetting the I/O shield
If your board has no built-in shield, fit the loose one into the case opening before you screw the board in. It is annoying to find out afterwards, because you have to remove the board. Many current boards have the shield attached already, so check the box and the board itself. Also check that the tabs of the shield do not fold into the port holes, since this blocks USB and network sockets.
over-tightening or cross-threading
Use gentle force. Screws should turn smoothly. If one feels stiff, back out and re-align. Over-tightening can strip threads or damage board layers, and that is often unrecoverable.
Cables: the 4+4 pin story and others
no CPU power
One of the most common causes of “my new PC does nothing” is the missing CPU power cable. It is the 8-pin connector (also described as 4+4 pin, EPS12V) at the top-left of the motherboard, near the CPU. It is separate from the 24-pin main connector and from the graphics card’s PCIe power plugs, and the power supply labels each cable (usually CPU or EPS). Some boards have two such connectors; the manual says whether both are required. The graphics PCIe plug looks similar but must not be put in the CPU socket.
| Connector | Location | Required? |
|---|---|---|
| 24-pin ATX | Right edge of the board | Always |
| 8-pin EPS (4+4) | Top-left near the CPU | Always (a second one is sometimes optional) |
| PCIe 6+2 or 12V-2×6 | On the graphics card | When the card has one |
| SATA power | SATA drives and some hubs | Only if used |
loose graphics card power
Connect every power socket on the graphics card and seat the plug fully. With 12V-2×6 connectors, the plug should sit flush with no visible gap, and the cable should not be bent sharply right at the connector. Card makers and PCI-SIG advise leaving a straight run before the first bend. Use the cables supplied for your power supply model, and do not mix cables between different brands or series.
front-panel connections
The tiny power and reset switch plugs are easy to place wrongly. Switches have no polarity, so they work either way round, but they must be on the correct pair of pins. LEDs have a positive and negative side, so if an LED does not light, flip the plug. USB 3 header plugs are keyed and the USB-C front connector needs a matching header on the board. Check the board manual before purchasing a case with USB-C if you want to use it.
the monitor cable in the wrong port
With a dedicated graphics card installed, plug the monitor into the card, not into the motherboard video ports. Fans spinning with a black screen is the classic result of getting this wrong.
First boot and setup tips
Skipping the memory profile
RAM often runs at a lower default speed until you enable its stored profile. Intel calls it XMP and AMD calls it EXPO. Enter the BIOS after the first boot, turn on the profile, then save and restart. If the PC fails to boot after enabling it, reset the BIOS or try a different profile, since some kits are fussier than others. Do not enable aggressive overclocking in the same session.
Not leaving time for the operating system
Prepare a Windows 11 USB installer using Microsoft’s media creation tool on another computer before you finish the build. Windows 11 requires TPM 2.0 and Secure Boot capability, and most current boards provide these as options called fTPM (AMD) or PTT (Intel). After install, run Windows Update, then install the graphics and chipset drivers.
Cable clutter and airflow
Poor cable routing blocks airflow and makes later upgrades harder. Route the 24-pin and CPU cables behind the tray, tie them with hook-and-loop straps, and keep cables away from fan blades. Set fans to a clear flow path: front and bottom intake, rear and top exhaust is the common arrangement. Make sure the front panel mesh and filters are not blocked by the case cover.
A worked checklist for the last five minutes
Before you plug in the power cord and press the button, run through the checks below. They take a few minutes and catch most beginner errors.
| Check | What to look at | Done? |
|---|---|---|
| CPU power | 8-pin plug at the top of the board, clicked in | Yes / No |
| 24-pin | Latch fully engaged | Yes / No |
| Graphics power | All connectors seated, no gaps | Yes / No |
| RAM | Both clips closed on each module | Yes / No |
| Cooler | Film removed, fan cable in CPU_FAN | Yes / No |
| Front panel | Power switch plugged into the correct pins | Yes / No |
| Monitor | Connected to the graphics card | Yes / No |
| Loose items | No stray screws or tools in the case | Yes / No |
| Cables | None touching any fan blade | Yes / No |
Safety and no-POST troubleshooting
Safety reminders
- Unplug the power supply before changing parts.
- Never open the power supply.
- Lift heavy cards and coolers with both hands and support them as you screw them in.
- Keep drinks away from the workspace.
If nothing happens when you press the button
- Check the wall socket and the switch on the back of the power supply.
- Check the 24-pin and the CPU 8-pin power plugs.
- Check the power switch plug on the front-panel header against the manual.
- Reseat the RAM.
If fans spin but there is no picture
- Confirm the monitor cable is on the graphics card and the monitor is set to the right input.
- Reseat the graphics card and its power plugs.
- Reseat RAM and try one stick at a time.
- Read the debug LEDs (CPU, DRAM, VGA, BOOT) on the board and match them with the manual.
- Clear the CMOS by using the button or jumper described in the manual.
Habits that prevent most problems
Beyond the individual mistakes, a few habits make a first build far safer. Build slowly and photograph each stage, so you can compare against the picture if something fails later. Keep the boxes, foam and anti-static bags until the system has run stably for a couple of weeks, because returns and warranty claims are simpler with original packaging. Test the system on the open table with only the minimum parts before you route every cable, since a fault is far easier to find when nothing is hidden. Finally, read each manual section once before doing that step, not after. Manufacturers such as ASUS, MSI, Gigabyte and ASRock print the same warnings that experienced builders repeat: align before you press, never force a connector, and keep the power off while you change parts.
How we compared
We compared manufacturer manuals, specifications and independent guides named below. We did not build or benchmark these systems ourselves.
Sources
- AMD AM5 platform and installation documentation
- Intel Core Ultra 200S and LGA1700 platform specifications
- Microsoft Windows 11 installation media and system requirements pages
- PCI-SIG and graphics card makers’ guidance on the 12V-2×6 connector
- Tom’s Hardware, PC Gamer and Gamers Nexus beginner build guides
- Motherboard, case, cooler and power supply manuals from major vendors
Frequently Asked Questions
What is the most common mistake in a first PC build?
The most common errors are forgetting the CPU power cable, not seating the RAM fully, and plugging the monitor into the motherboard instead of the graphics card. All three are quick to check.
How much thermal paste should I use?
A pea-sized dot in the centre of the CPU is the standard advice. If the cooler already has paste on the base, do not add more. Remove any clear plastic film first.
Do I need an anti-static wrist strap?
It is not essential. Touching bare case metal often, holding parts by the edges and building on a hard surface are enough for most people.
What is the 4+4 pin connector?
It is the CPU power connector, also called EPS. It is made of two four-pin halves that can be joined into one 8-pin plug and goes to the top of the motherboard near the CPU. Use the cable labelled CPU or EPS from your power supply.
Why does my new build turn on but show nothing?
Check that the monitor is connected to the graphics card, that the RAM is fully seated and that the graphics card power cables are connected. The debug lights on the board show which stage failed.
Can I use the I/O shield that came with my case?
Use the one that comes with your motherboard, if it has a separate one. If the board has a built-in shield, do not install a second.
Should I enable XMP or EXPO?
Yes, after the first successful boot. It lets your memory run at its advertised speed. If the PC becomes unstable, try a lower speed or update the BIOS.
When should I ask for help instead of continuing?
If a part does not fit without force, if you see burn marks or smell burning, or if the system keeps shutting off, stop and contact the manufacturer or retailer. Forcing a part usually makes the problem worse and can void the warranty.