
Key takeaways
- Chassis Construction: Budget boxes (under $100) are typically housed in 3D-printed plastic (PLA or PETG) or simple injection-molded ABS plastic project boxes. While functional, 3D-printed lines can collect dust, and thinner plastics can creak under heavy button presses. Mid-range and premium boxes transition to CNC-machined billet aluminum or heavy-duty steel enclosures that completely eliminate flex.
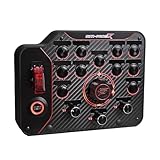
- Faceplate Quality: The front plate of the box takes the brunt of the physical force. Premium models feature real carbon fiber faceplates (usually 2mm to 4mm thick) or brushed aluminum panels. These materials not only look stunning under LED desk lighting but also ensure that the nuts holding the switches in place do not strip or crack the surrounding housing over time.
What's inside
Building your first simulator rig is an exciting journey, but it is easy to get lost in the high-ticket items like direct-drive wheelbases and load-cell pedals. Many beginners spend their entire budget on raw force feedback, only to realize mid-race that they have no easy way to adjust brake bias, flash their headlights, or navigate real-time pit menus. This is where a dedicated button box becomes essential. It bridges the gap between a standard wheel-rim layout and the complex, multi-layered control decks found in real GT3 and endurance race cars.
However, many newcomers fall into classic traps when looking for a sim racing button box buying guide for beginners. They often buy the box with the highest raw button count, only to realize all 30 buttons feel identical, making muscle memory impossible. Others buy cheap, lightweight plastic enclosures that flex or rattle when mounted next to a powerful force-feedback wheel. To help you avoid these costly mistakes, this guide breaks down exactly what features, materials, and ergonomics actually matter for your home setup.
As an Amazon Associate we earn from qualifying purchases at no extra cost to you. Product prices and availability are accurate as of the date shown and are subject to change.



Decide These 3 Things First
Before comparing specific models, you must clarify three fundamental aspects of your current setup and racing style. Answering these questions immediately narrows down your options and prevents buyer’s remorse.
- Your Platform (PC vs. Console): This is the ultimate dealbreaker. Over 95% of the button boxes on the market are designed exclusively for PC. Windows reads these devices as generic USB game controllers, allowing for instant, plug-and-play mapping. If you race on Xbox or PlayStation, standard USB button boxes will not work natively because consoles do not support multiple independent USB controller inputs for a single game. Console racers must look for specialized, brand-specific expansion modules or use third-party keyboard emulators.
- Input Variety vs. Raw Button Count: Do not fall into the “more is always better” trap. A box with 30 identical push buttons is incredibly difficult to use while wearing a VR headset or keeping your eyes on the track. Instead, look for a layout with high input variety. Having a mix of momentary push buttons, rotary encoders (dials), two-way toggle switches, and guarded switches allows your fingers to instantly recognize where they are by touch alone.
- Rig Orientation and Placement: Where will this device live? If you have a desk-clamp setup, you will need a compact, horizontal box that can sit flat or mount via a small clamp. If you have an aluminum profile (8020) cockpit, you have the freedom to mount a larger, vertical box directly at wheel level. Measure your available clearance before clicking buy.
Size, Footprint, and Mounting Compatibility
A button box needs to be easily reachable without forcing you to take your eyes off the apex. Therefore, the physical dimensions and mounting styles are critical. Most budget-to-mid-range button boxes feature a footprint of roughly 150mm to 220mm in width, 100mm to 150mm in height, and 50mm to 80mm in depth. They typically weigh between 400 grams and 1.2 kilograms.
How the box mounts to your rig determines its stability. Look for boxes that feature industry-standard mounting patterns. The most common is the VESA 75mm x 75mm or 100mm x 100mm threaded hole pattern on the rear panel, which allows you to use standard monitor mount arms or articulated brackets. Alternatively, many high-quality boxes feature integrated M6 threaded inserts on the sides or rear, allowing you to bolt them directly to 40-series aluminum profile channels using T-nuts and short bolts. Avoid boxes that rely solely on adhesive strips or hook-and-loop tape; the constant mechanical force of pushing heavy-duty toggle switches will quickly peel them loose.
Materials and Structural Rigidity
The materials used in a button box dictate both its long-term durability and how premium it feels in your hand. Since this is a tactile interface, structural flex is the enemy of immersion.
- Chassis Construction: Budget boxes (under $100) are typically housed in 3D-printed plastic (PLA or PETG) or simple injection-molded ABS plastic project boxes. While functional, 3D-printed lines can collect dust, and thinner plastics can creak under heavy button presses. Mid-range and premium boxes transition to CNC-machined billet aluminum or heavy-duty steel enclosures that completely eliminate flex.
- Faceplate Quality: The front plate of the box takes the brunt of the physical force. Premium models feature real carbon fiber faceplates (usually 2mm to 4mm thick) or brushed aluminum panels. These materials not only look stunning under LED desk lighting but also ensure that the nuts holding the switches in place do not strip or crack the surrounding housing over time.
Tactile Feedback and Switch Quality
When you are flying down the Mulsanne Straight at night, you cannot look down to see if you successfully adjusted your traction control. You must rely entirely on tactile and auditory feedback.
Look for switches that offer a distinct, mechanical “snap” or “click” when actuated. Cheap buttons feel mushy and can lead to accidental double-inputs. Rotary encoders (the dials used for brake bias or engine maps) must have firm, physical detents (individual clicks) as you turn them. If an encoder spins too freely, you risk changing your brake bias by 4% instead of 1% with a single accidental nudge. High-quality boxes utilize industrial-grade CTS or Alps encoders that require a deliberate, satisfying force to turn. Additionally, guarded toggle switches (the ones with flip-up safety covers) are excellent for high-consequence mappings like your ignition switch or pit lane speed limiter.
Price Tiers and What You Get
Understanding what your money actually buys in the button box market prevents you from overpaying for features you do not need, or underbuying and ending up with a flimsy piece of plastic.
- Budget ($50 – $90): In this tier, you will find highly functional, plug-and-play boxes like the PXN CB1 Sim Racing Button Box. Typically priced around $89.99, these boxes offer an impressive array of controls (often up to 19 inputs with 9 distinct control types, including rotary dials and toggle switches) housed in sturdy ABS plastic casings. They are perfect for beginners who want to plug in a single USB cable and instantly gain full control over their pit strategies.
- Mid-Range ($100 – $190): Stepping up to this tier, such as the SIM-PANEL PC Sim Racing Gen 2 Button Box (priced around $179.95), introduces premium materials. You can expect horizontal layouts, thicker faceplates, metal toggle switches, and more robust mounting options. The internal wiring is cleaner, and the switches offer a much firmer, more realistic mechanical resistance.
- Premium ($200 – $400+): At the high end, button boxes are built to replicate real-world motorsport components. These feature genuine carbon fiber faceplates, CNC-machined aluminum enclosures, individual LED backlighting for every key, and rotary switches that can be programmed for multi-position telemetry inputs. Many also feature integrated telemetry-driven displays or shift lights.
Connectivity and Software Integration
As we look at the landscape of sim racing gear in 2026, button boxes have transitioned from requiring complex third-party software setups to offering seamless, driverless integration. Most modern boxes are recognized by Windows as generic “DirectInput” devices. This means you do not need to run proprietary software in the background; you simply open your favorite simulation (such as iRacing, Assetto Corsa Competizione, or Automobilista 2), click the control you want to map, and press the corresponding button on your box.
However, if you buy a box with dynamic LED backlighting, you may want to use industry-standard software like SimHub. SimHub allows you to program the LEDs to react to in-game telemetry—for example, flashing red when the pit lane speed limiter is active, or turning blue when a yellow flag is waved in your sector. Ensure the box you choose uses a detachable USB connection (typically USB-C or USB-B). Avoid hardwired cables; if a hardwired cable gets snagged or damaged, the entire button box becomes useless. A detachable cable can be replaced in seconds for a few dollars.
Spec Checklist
Use this quick-reference table to match your budget and expectations with the correct tier of button box features.
| Feature | Budget ($50 – $90) | Mid-Range ($100 – $190) | Premium ($200 – $400+) |
|---|---|---|---|
| Chassis Material | 3D-printed PLA or molded ABS plastic | Thick ABS plastic or hybrid acrylic/metal | CNC-machined billet aluminum or steel |
| Faceplate | Plastic / Matte vinyl wrap | Acrylic or brushed aluminum | Genuine 3mm to 4mm carbon fiber |
| Input Variety | Standard push buttons, basic dials | Tactile toggles, CTS encoders, start button | Motorsport-grade switches, multi-position rotary dials |
| Connection Type | Often hardwired USB-A or basic USB-B | Detachable USB-B or USB-C | Detachable, shielded USB-C with strain relief |
| Mounting Options | Basic brackets or adhesive tape | VESA 75×75 threaded inserts or bracket mounts | Multi-point VESA, M6 side slots, and profile mounts |
| Backlighting | None | Static single-color LEDs (optional) | Telemetry-controlled RGB LEDs per key |
Red Flags to Avoid
When shopping for your first button box, keep an eye out for these common warning signs that point to poor quality or poor usability:
- No Dedicated Mounting Holes: If a product listing does not explicitly state the mounting pattern (such as VESA 75 or specific threaded insert sizes) and only shows pictures of the box resting loose on a desk, skip it. You cannot race effectively if you have to hold the box steady with one hand while turning a dial with the other.
- Free-Spinning Rotary Knobs: If the product description mentions “smooth-spinning” or “continuous” dials without mentioning detents or clicks, these are likely cheap potentiometers rather than rotary encoders. Without distinct physical clicks, adjusting values like brake bias or traction control level in precise increments while driving is nearly impossible.
- Hardwired, Unshielded USB Cables: Cheap boxes often use thin, non-detachable USB cables. Not only are these prone to breaking, but they also lack shielding. If you mount an unshielded cable close to a high-torque Direct Drive wheelbase, the electromagnetic interference (EMI) can cause ghost inputs, leading to random button presses mid-race.
- Lack of Spatial Layout Design: Avoid boxes where every single button is the exact same size, color, and spacing. Your brain cannot build muscle memory on a uniform grid of identical switches. Look for layouts that group controls logically using different shapes, colors, or physical barriers.
FAQ
Do I need to install drivers to use a sim racing button box?
For the vast majority of PC-compatible button boxes, no drivers are required. They utilize standard Windows DirectInput protocols. Windows will automatically recognize the device as a generic USB game controller as soon as you plug it in, allowing you to map the buttons immediately within your simulator’s settings menu.
Can I use a PC button box on my PlayStation 5 or Xbox Series X?
Natively, no. Modern consoles do not support multiple independent USB input devices for a single game. To use a button box on a console, you would need specialized hardware adapters (like a DriveHub) or a button box specifically engineered by console-supported brands (like Fanatec or Thrustmaster) that plugs directly into the wheel hub itself rather than the console.
What is the difference between a momentary toggle and a latching toggle switch?
A momentary toggle switch springs back to its center position immediately after you flip it, sending a single, quick pulse to the PC (ideal for flashing headlights or flashing pit limiters). A latching toggle switch physically stays in the “up” or “down” position until you move it back, which is great for functions like turning the car’s main ignition switch on or off.
How do I mount a button box if I don’t have an aluminum profile rig?
If you use a wheel stand or a desk setup, look for button boxes that feature VESA-compatible rear mounts. You can purchase highly affordable desktop monitor desk clamps or articulated tablet mounts that bolt directly to the back of the button box, allowing you to clamp the device securely to the edge of your desk or to a tubular wheel stand frame.


