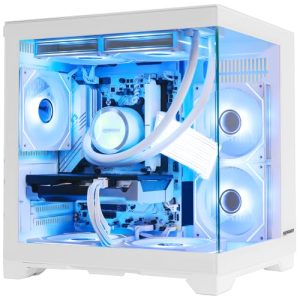
Our Top Picks
To clean a case fan, unplug the PC, hold the blades still and brush or blow the dust off both sides; to replace one, unplug its cable from the motherboard, remove the four screws or rubber mounts, fit a new fan of the same size facing the same airflow direction, and plug it into a matching fan header. The whole job takes 10 to 30 minutes per fan and needs only a screwdriver.
Decide First: Clean or Replace?
| Symptom | Likely cause | Action |
|---|---|---|
| Fan spins but looks dusty, temperatures slightly up | Dust build-up | Clean |
| Fan hums or buzzes at one speed | Vibration against case or loose screws, or dust imbalance | Clean and re-tighten; replace if it persists |
| Grinding, clicking or rattling that does not stop after cleaning | Worn bearing | Replace |
| Fan stops or stutters, shows 0 RPM in BIOS | Failed motor, loose cable or wrong header setting | Reseat cable, check header; replace if dead |
| Cracked blade or bent frame | Physical damage | Replace |
| Want quieter operation or better airflow | Stock fans are basic | Replace with the same size |
Cleaning Case Fans
What you need
- A Phillips screwdriver.
- Compressed air or an electric duster.
- A soft brush and lint-free cloth.
- Cotton buds to jam between blades.
Steps
- Shut down, switch off the power supply and unplug the power cable from the wall.
- Open the side panel and look for dust on the fan blades and the frame, and on the filter in front of intake fans.
- Immobilise the blades with a cotton bud or finger, then blow dust away in short bursts with the can upright. Allowing a fan to free-spin under compressed air can push it above its normal speed and harm the bearing, which is why fan and cooler makers often warn against it.
- Wipe the blades and frame with a dry or barely damp lint-free cloth. Wikipedia’s computer cooling article advises regular visual checks on cooler and case fans and keeping dust filters clean for good airflow.
- Remove the case dust filter, clean it and let it dry completely if it is washable (the maker’s manual will say). Refit it.
- Close the case, reconnect power and watch the fans spin on boot.
If a fan is very dirty, taking it off the case makes it easier to clean both sides, which is the same as the first stage of replacing it.

EverCool EC4010M12CA Case Fan, 40x40x10mm 3-pin + 7"x6" Microfiber Cleaning Cloth
Chosen because it specifies 40x40x10mm 3-pin + 7"x6" Microfiber Cleaning Cloth.
View on Amazon
Chrees PC Fan Dust Filter with Magnetic Frame 120mm Computer Cooler Mesh | Fine PVC Mesh Resists Dust Buildup, Protects Cables From Fan Blades, Easy to Install and Clean, for PC Case or Power Supply
Chosen because it specifies Fine PVC Mesh Resists Dust Buildup and Protects Cables From Fan Blades.
View on Amazon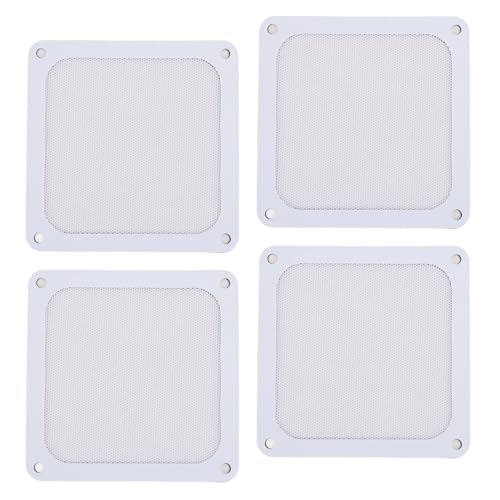
Chrees PC Fan Dust Filter with Magnetic Frame 120mm Computer Cooler Mesh | Fine PVC Mesh Resists Dust Buildup, Protects Cables From Fan Blades, Easy to Install and Clean, for PC Case or Power Supply
Chosen because it specifies Fine PVC Mesh Resists Dust Buildup and Protects Cables From Fan Blades.
View on AmazonReplacing a Case Fan: Step by Step
- Measure and match the size. Common case fan sizes are 120 mm and 140 mm, and many cases have fixed mounting slots for either. Some cases take 80 mm, 92 mm or 200 mm fans. The size is the frame dimension, and the mounting holes have to match. Check the case manual or measure the existing fan from hole to hole before buying.
- Decide the connector type. A 4-pin fan is controlled by PWM, so the motherboard can change its speed through the signal wire. A 3-pin fan is controlled by voltage, which also works on most boards but may need the header set to DC mode in the BIOS. Many boards allow both types on the same header; check the motherboard manual for how each header is configured.
- Power down and unplug. Switch off the power supply and unplug the wall lead.
- Trace the old fan’s cable to its connector, take a photo for reference, and unplug it from the header or fan hub.
- Remove the old fan. Hold the fan with one hand while you remove the screws, so it does not drop onto the board. Some fans use rubber pins or tool-free clips, in which case follow the case manual.
- Check the airflow arrows. Most fans have two arrows moulded in the frame: one showing blade rotation, the other showing air direction. Typically, front and bottom fans bring air in and rear and top fans push air out, but your case’s manual defines the intended airflow.
- Fit the new fan in the same orientation as the old one, with the cable facing a side where it can be routed neatly.
- Screw it in evenly, not overtight; over-tightening can crack the frame or transmit more vibration. Rubber mounts or silicone pads reduce vibration where the maker supplies them.
- Connect the cable to the chosen header, such as CHA_FAN or SYS_FAN, or to a fan hub, then tidy the cable so it cannot touch the blades.
- Boot to BIOS and confirm the fan shows an RPM reading and responds to the fan curve.
Header and Connector Reference
| Fan connector | Control | Works with | Note |
|---|---|---|---|
| 4-pin PWM | Signal wire sets speed | 4-pin header, also fits 3-pin header (speed control may be limited) | Common on current fans |
| 3-pin DC | Voltage adjusts speed | 3-pin header or 4-pin header set to DC mode | Not all boards control it well |
| Molex adapter | Full-speed from the power supply | Power supply cable | Often no speed monitoring |
| Fan hub or splitter | Shared header | Several fans on one header | Check the header’s current rating in the manual |
| ARGB or RGB lighting lead | Separate lighting control | Lighting header on the board | Does not carry fan power |
Picking a Replacement Fan
- Airflow fans suit unobstructed intake and exhaust positions. They move more air at a given speed.
- Static pressure fans suit positions behind dust filters, radiators or dense mesh, where airflow meets resistance. Makers such as Noctua and Arctic describe their fan lines in these terms.
- Bearing type affects noise and lifespan. Makers publish different bearing designs, and reviewers often compare noise at similar speed rather than at maximum.
- Daisy-chain or hub support helps when your board has few headers.
- Budget, mid-range and premium tiers exist. A budget fan is fine for a basic exhaust; a premium fan mostly buys lower noise and a longer warranty.
Common Mistakes
- Fitting a fan facing the wrong direction, which fights the case’s airflow design.
- Mixing up 3-pin and 4-pin settings in the BIOS and ending up with a fan stuck at full or minimum speed.
- Plugging several fans into one motherboard header without checking the rated current.
- Leaving the cable loose where it can hit the blades.
- Cleaning with a fan free-spinning under compressed air.
- Over-tightening screws against plastic frames.
- Forgetting the case’s dust filter, which makes new fans collect dust faster.
Safety
Unplug the PC from the wall before working inside. Touch bare case metal to discharge static. Never open the power supply. If a fan melts, smells burnt or its connector is discoloured, stop using it and contact the maker; a damaged fan connector or header should be inspected by a technician.
Frequently Asked Questions
How often should I clean case fans?
There is no fixed schedule, but a quick check every few months suits most homes. Clean sooner if you notice higher fan noise, dust on the filter or rising temperatures.
Can I replace a 120 mm fan with a 140 mm fan?
Only where the case has mounting holes for both sizes, which many do in the front and top. A 140 mm fan will not fit holes spaced for 120 mm. The case specification page or manual lists supported sizes.
Do I need to replace all case fans at the same time?
No. Replace failed or noisy fans first. Mixing fan models works, though matching them can make the sound more uniform.
Which direction should case fans face?
Follow the arrows on the frame and the case maker’s airflow diagram. A common layout is intake at the front, exhaust at the rear and top, but cases with different designs can vary.
Why does the new fan not show up in the BIOS?
The cable may be on a header that does not report RPM, such as a power-only connector or hub, or the 4-pin connector may be misaligned. Reseat it and check the header name in the motherboard manual.
Is it normal for a new fan to be louder at first?
A fan running at full speed on a header that is set to a fixed mode can be loud. Set a fan curve in the BIOS or software so it ramps with temperature. If grinding or clicking continues, contact the seller or maker.
FAQ
How often should I clean case fans?
Can I replace a 120 mm fan with a 140 mm fan?
Do I need to replace all case fans at the same time?
Which direction should case fans face?
Why does the new fan not show up in the BIOS?
Is it normal for a new fan to be louder at first?
More from Amazon
Programs that pair well with the guide above. Offers and eligibility are set by Amazon and may change.
Free shipping on eligible items, Prime Video and more. Eligible new members can start with a free trial.
Start a Prime free trialAd-free music streaming. Eligible new subscribers can start with a free trial.
Try Music Unlimited freeA Prime membership for ages 18-24 with a trial period. Eligibility is set by Amazon.
See Prime for Young AdultsAudiobooks and podcasts to listen to on the go. Eligible new members can start with a free trial.
Try Audible freeAs an Amazon Associate we earn from qualifying purchases.